The Bulk Importer
How to use The Bulk Importer
-
Getting Started Day To Day Management Managing Users Managing Multiple Schools The Dashboard The Template Editor Managing Staff Profiles Advanced Editor Insights and Reporting User Settings MIS Integration Troubleshooting and Support Safeguarding Guide What's New External Checks Sign In App Integration Incident Tracking
Table of Contents
Important: Please DO NOT use the bulk importer to update data in bulk for existing profiles, the bulk importer should only be used to create new profiles. Scroll down to the bottom of this help guide for more information on this.
Video Guide
The Bulk Importer
We've tried to make it as easy as we can to load your existing data into our system. To do this, we provide our Bulk Importer tool.
This is a grid that provides a staging environment so you can prepare your data before loading it into the system for real.
Profile Types
At the very top of the Bulk Importer is a selector for the Profile Types. Each tab will give you access to a separate sheet for each type.
If you import and discover later on that you need to change the Profile Type, you can Change a Profile Type.
Get Started
To get started, you can find the bulk importer under Settings >Organisation> Bulk Importer.
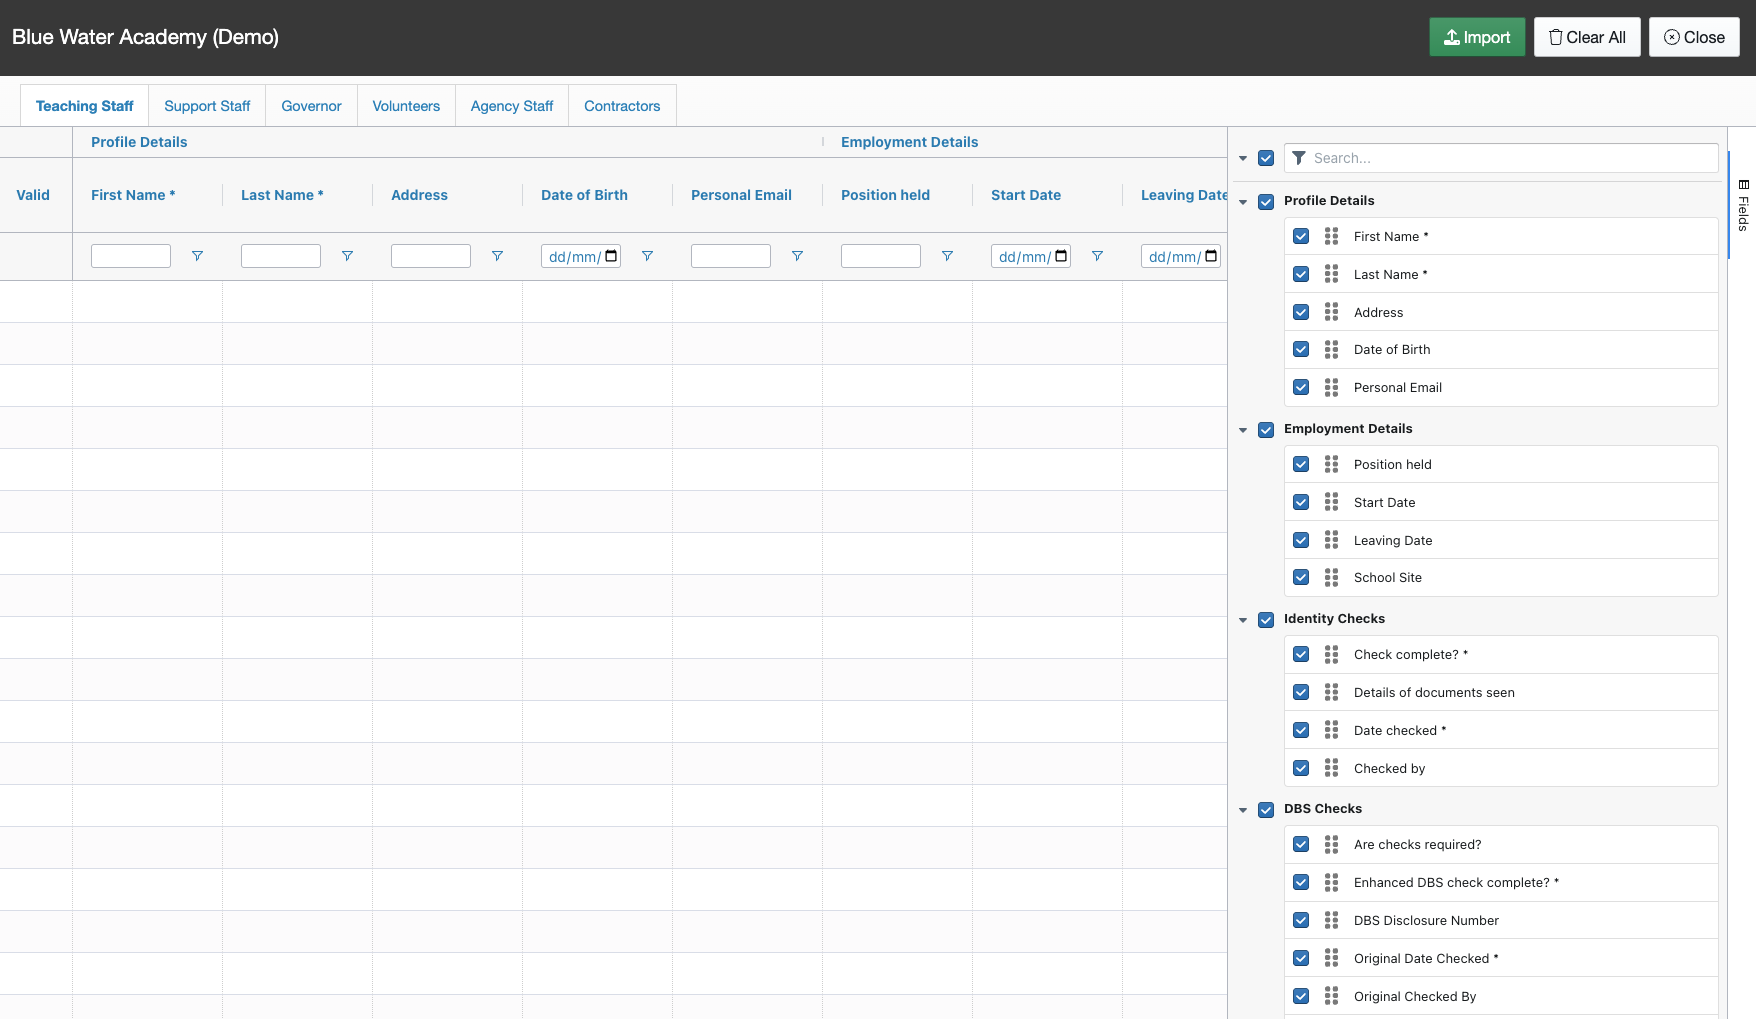
The importer provides an Excel-like grid, that allows you to directly copy and paste from your existing Excel (or similar).
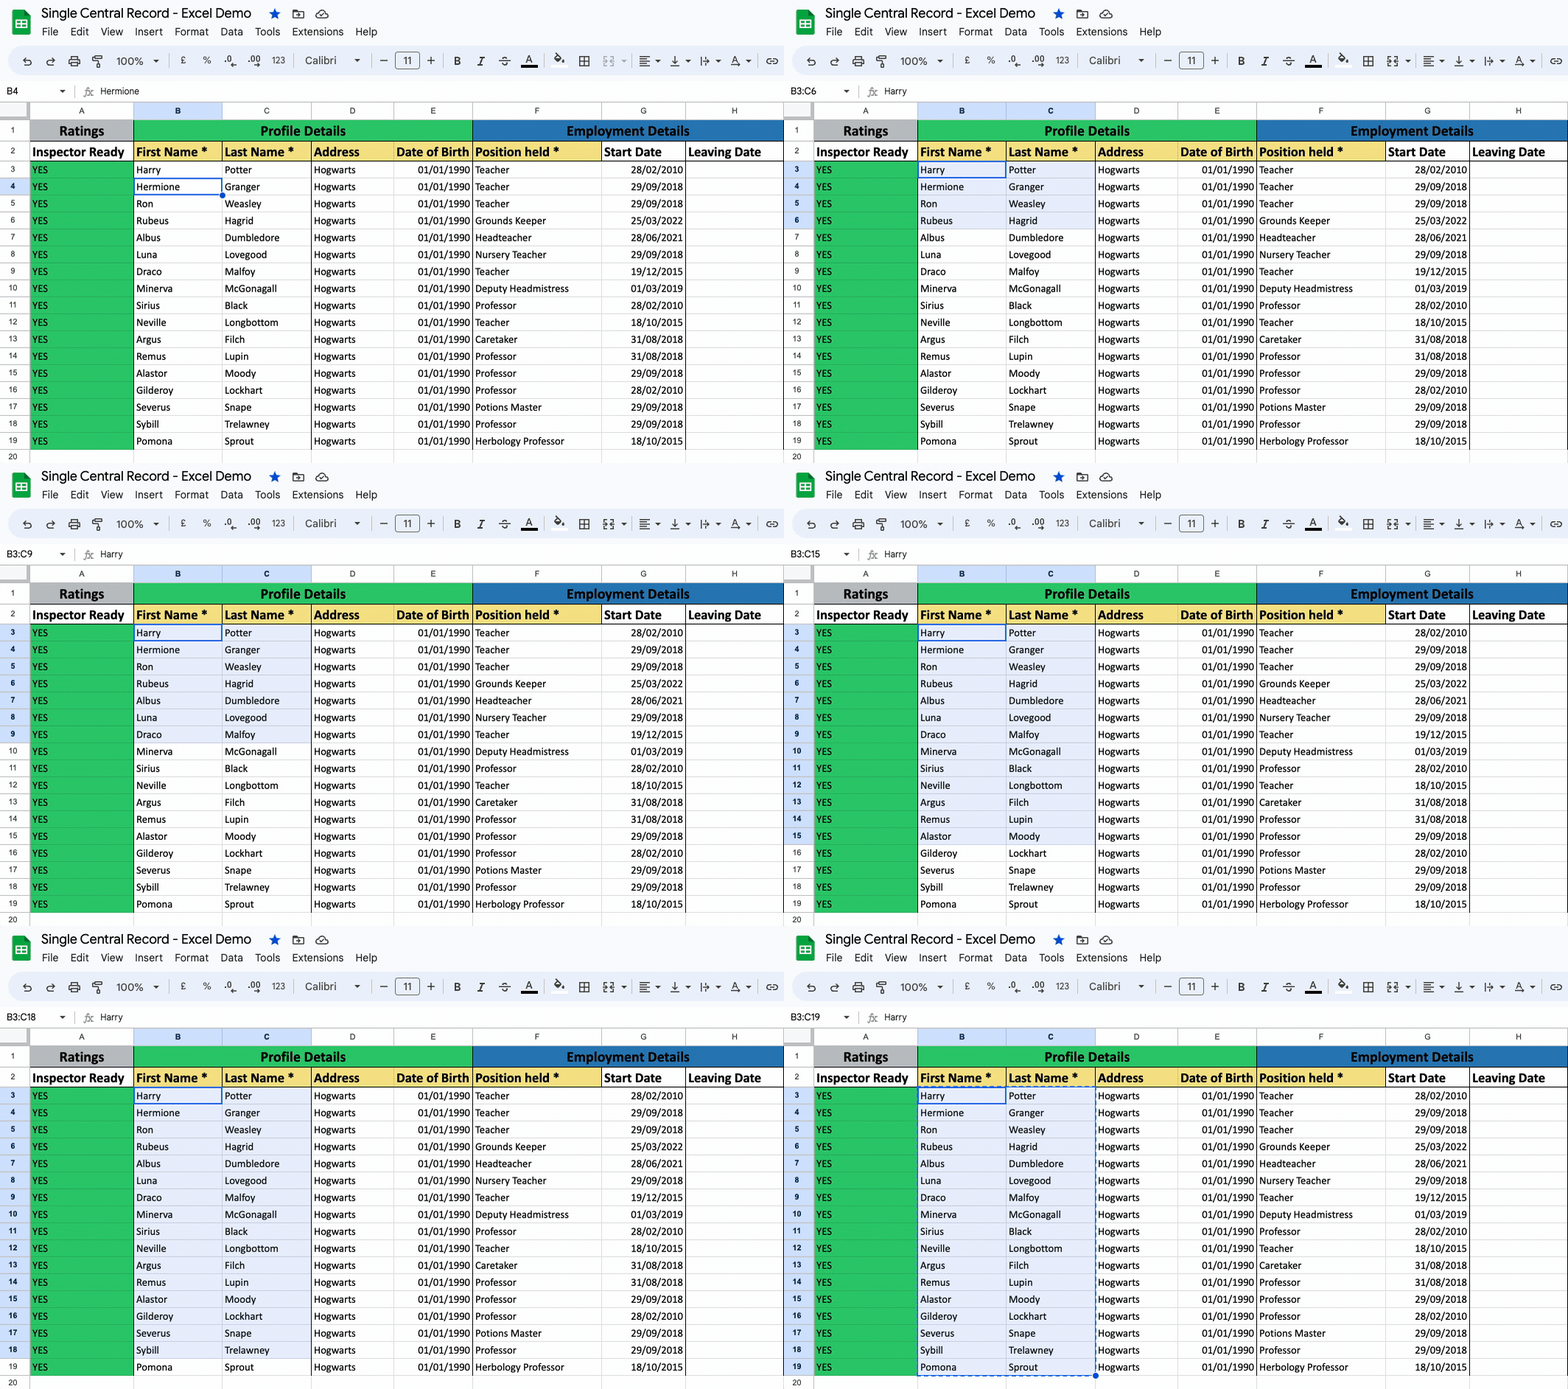
We highly recommend copying one column at a time, or you can copy two/three columns if they match up perfectly with the columns in the Bulk Importer. To do this, while in your Excel document, simply left-click on the first cell, while holding the button down, drag to the last cell.
You can then Right click > Copy, or press Ctrl + C to copy the data:
If you then go to the bulk importer and select the first cell in the relevant column, you can then paste by pressing Ctrl + V. (Please note that right-click and paste will not work in most browsers due to security settings.)
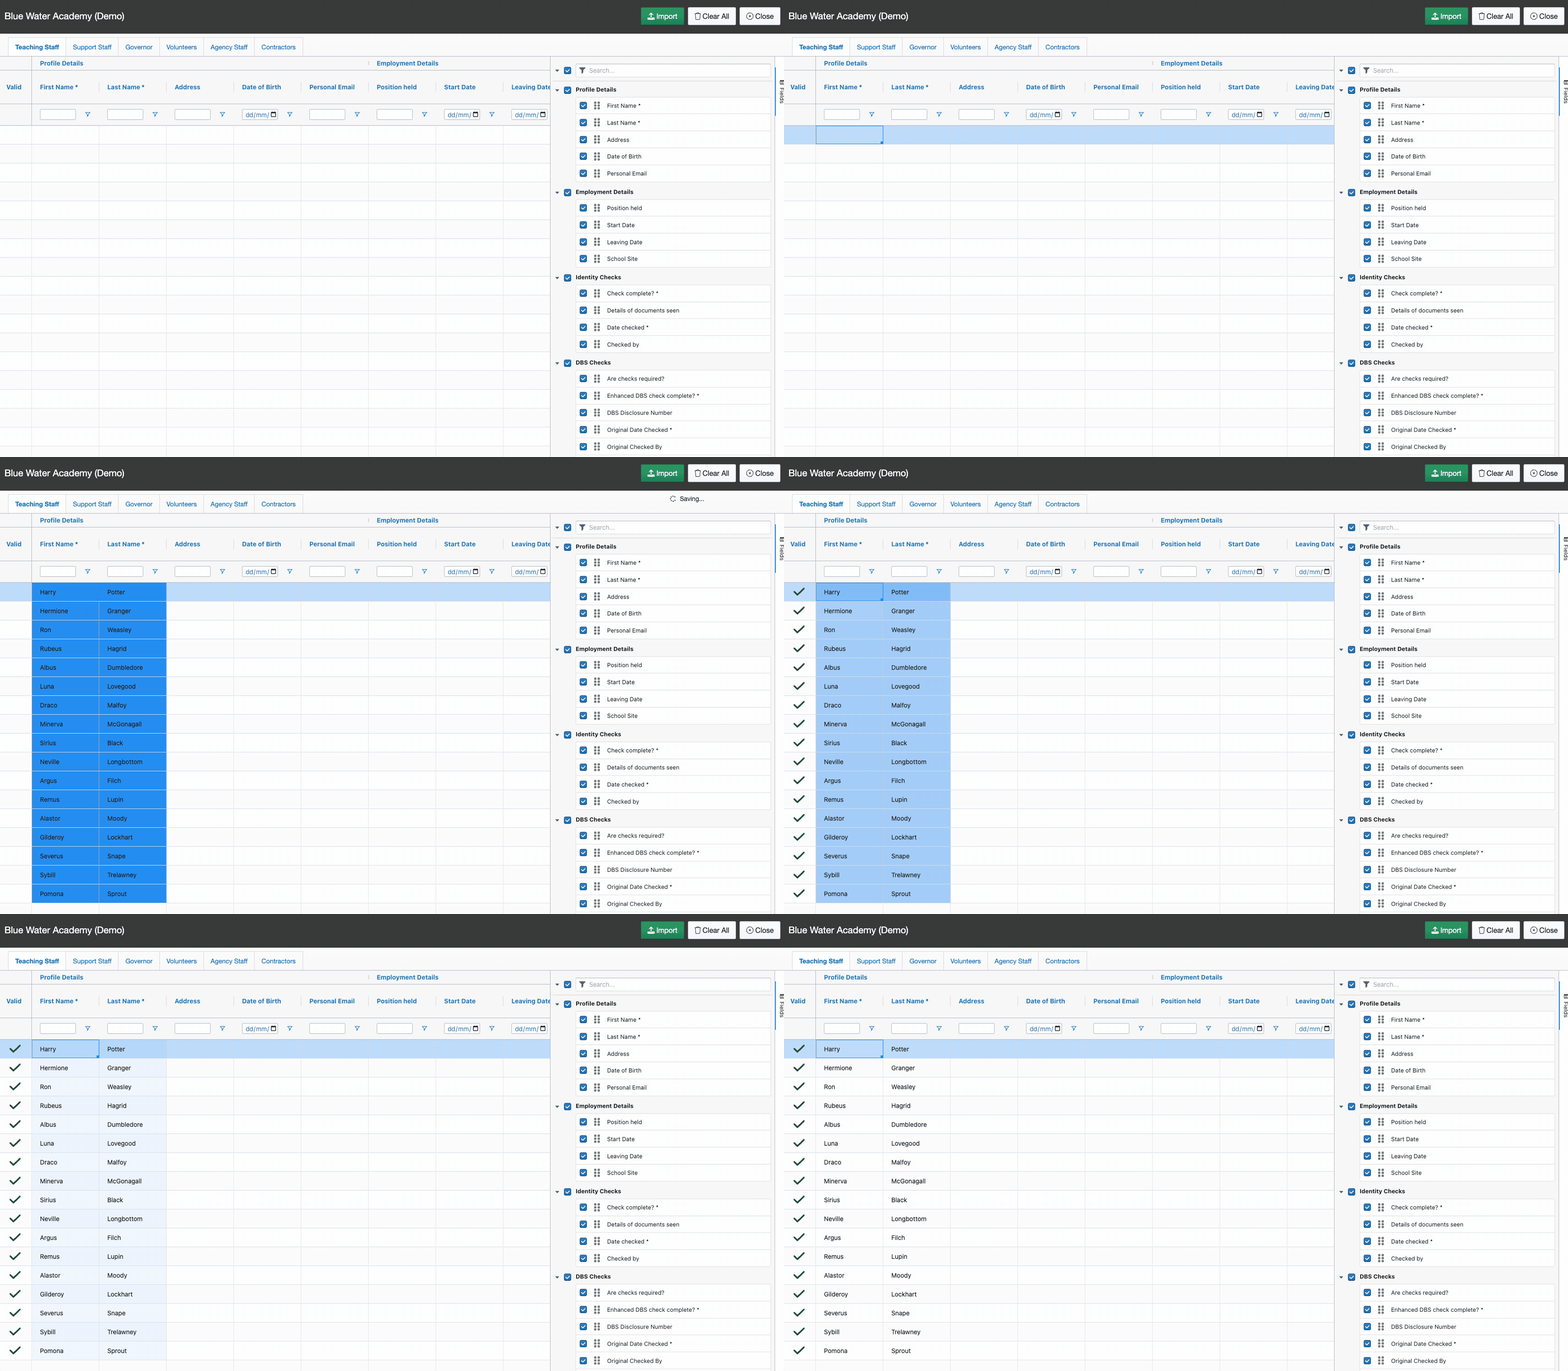
Once you have pasted, you will notice a column of green ticks appear down the left-hand side of the tool. This is just the system checking that the data in each cell is valid.
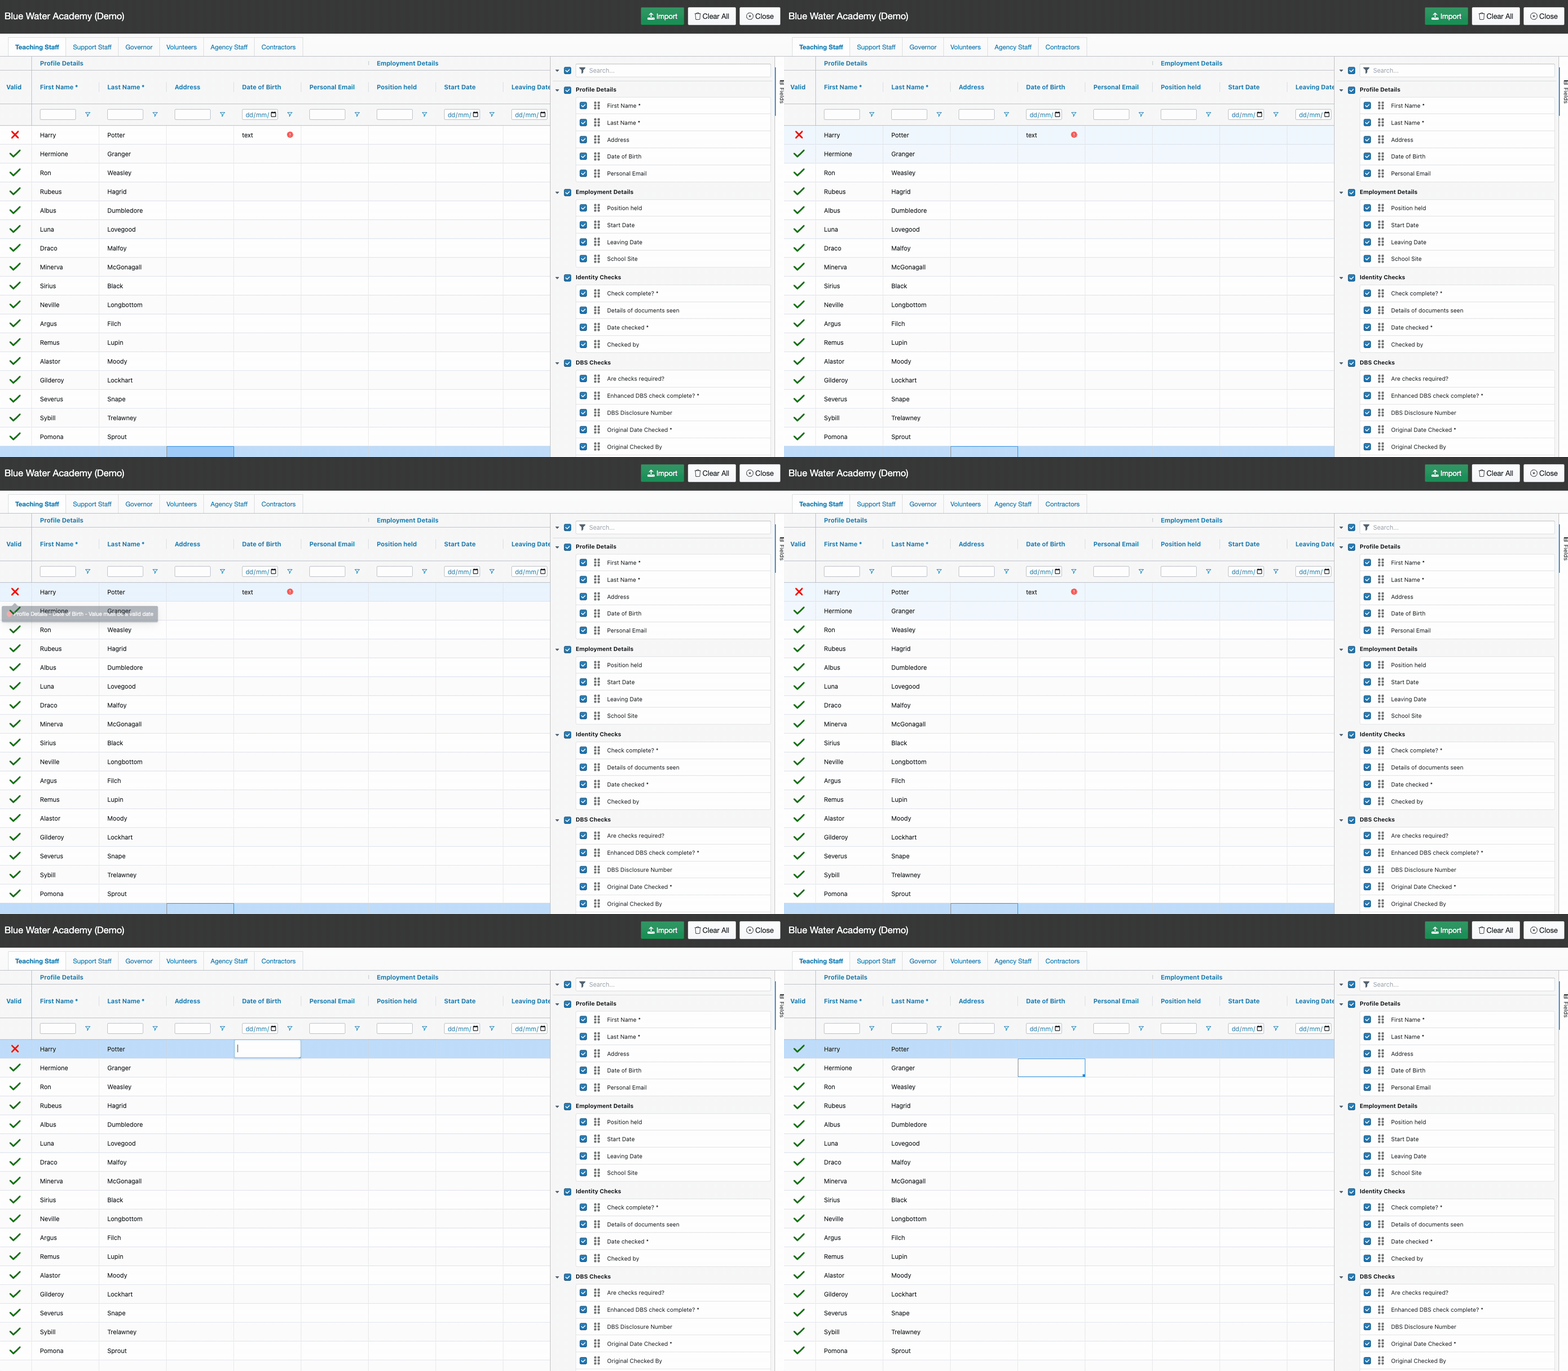
If you have any invalid data, this will show as a red cross. If you hover over a red cross, this will tell you exactly where the invalid date is so you can go and either correct or remove this:
Once you have pasted your Profile Details, you can make use of the field selector down the right-hand side of the tool to narrow down your view.
If you de-select all fields (which just hides them it doesn't delete anything) you can then re-select First/Last name, and then go section by section, copying and pasting the data across from your spreadsheet:
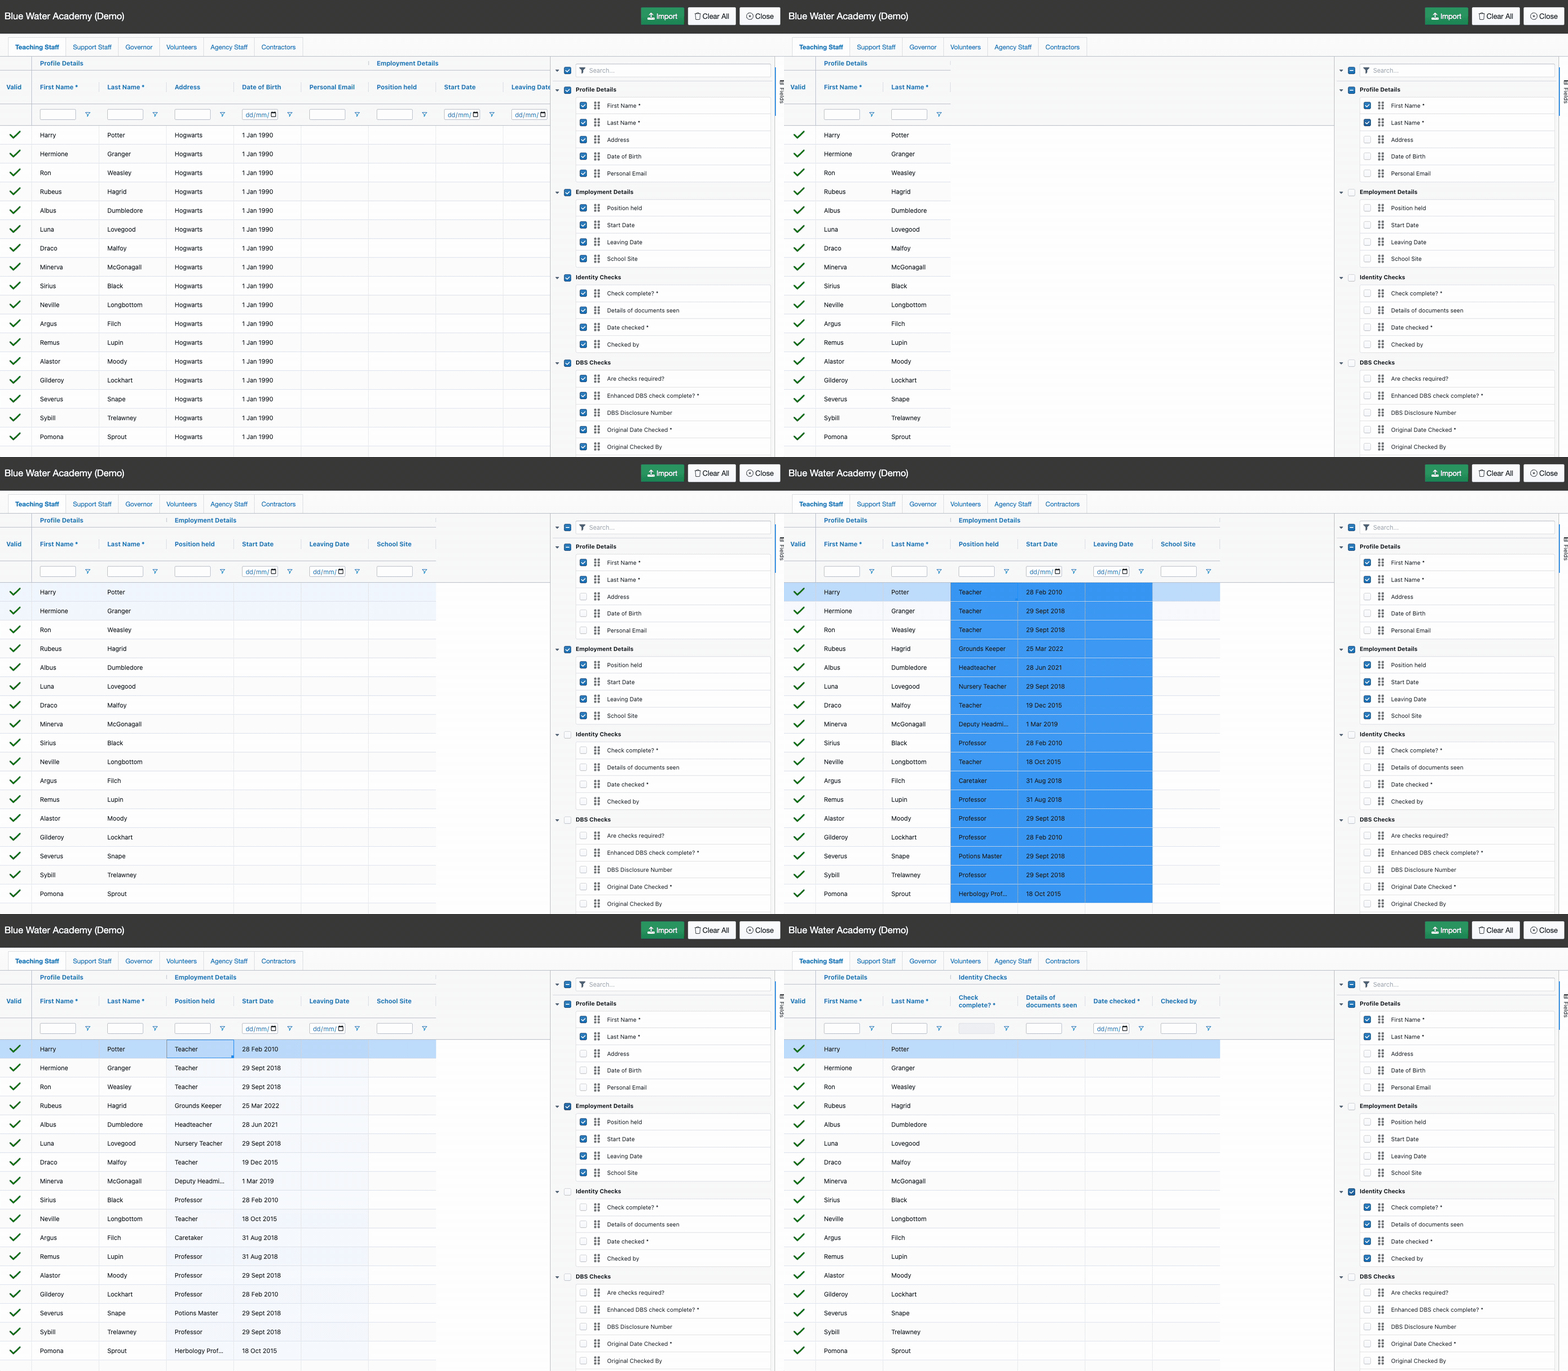
Any changes you make in the Bulk Importer will automatically save, so if you need to log off and come back to this, you can pick up where you left off.
Once you have loaded all your columns into each of the Profile Type tabs, simply click the Import button to create the profiles. If all your data is valid, you will be presented with the following:
Note: If you have any invalid data at this point, the system won't let you import.
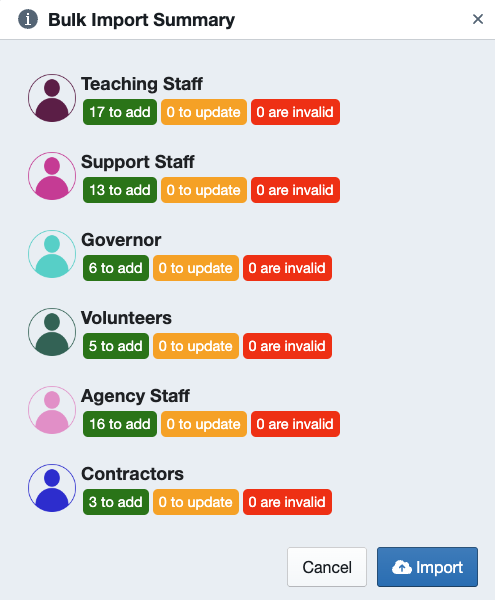
Confirm the numbers are ok, then press Import to create your profiles.
Once your profiles have been created, it may take a minute for the system to finish calculating the scores. Press refresh on your browser if you don't see any profiles.
Update Profiles after Import
Once you have imported, the system will take you to a list of profiles it has created. It's then very important to come back into the Bulk Importer, and select 'Clear All' to clear out any previously imported data.
If you don't clear the importer and were to carry out another import, the data would over-write your previously imported profiles (deleting any work you had done to those profiles) and may also cause duplicate profiles which you would then need to go through and delete.
To edit or update any data for previously imported profiles, you can either do this via an individual's Profile Page or in bulk via The Advanced Editor.
Importing more Profiles
If you've already done an import and decide you need to load more in, this is fine. You must first press the 'Clear All' button in the Bulk Importer before you start, then you can repeat the above process.
Deleting Rows on the Bulk Importer
If you have created additional rows in error on the Bulk Importer, you can delete these either individually or in bulk.
- To delete an individual row: Right-click on the row and select Delete 1 row... The system will then ask you to confirm the deletion, as this cannot be undone.
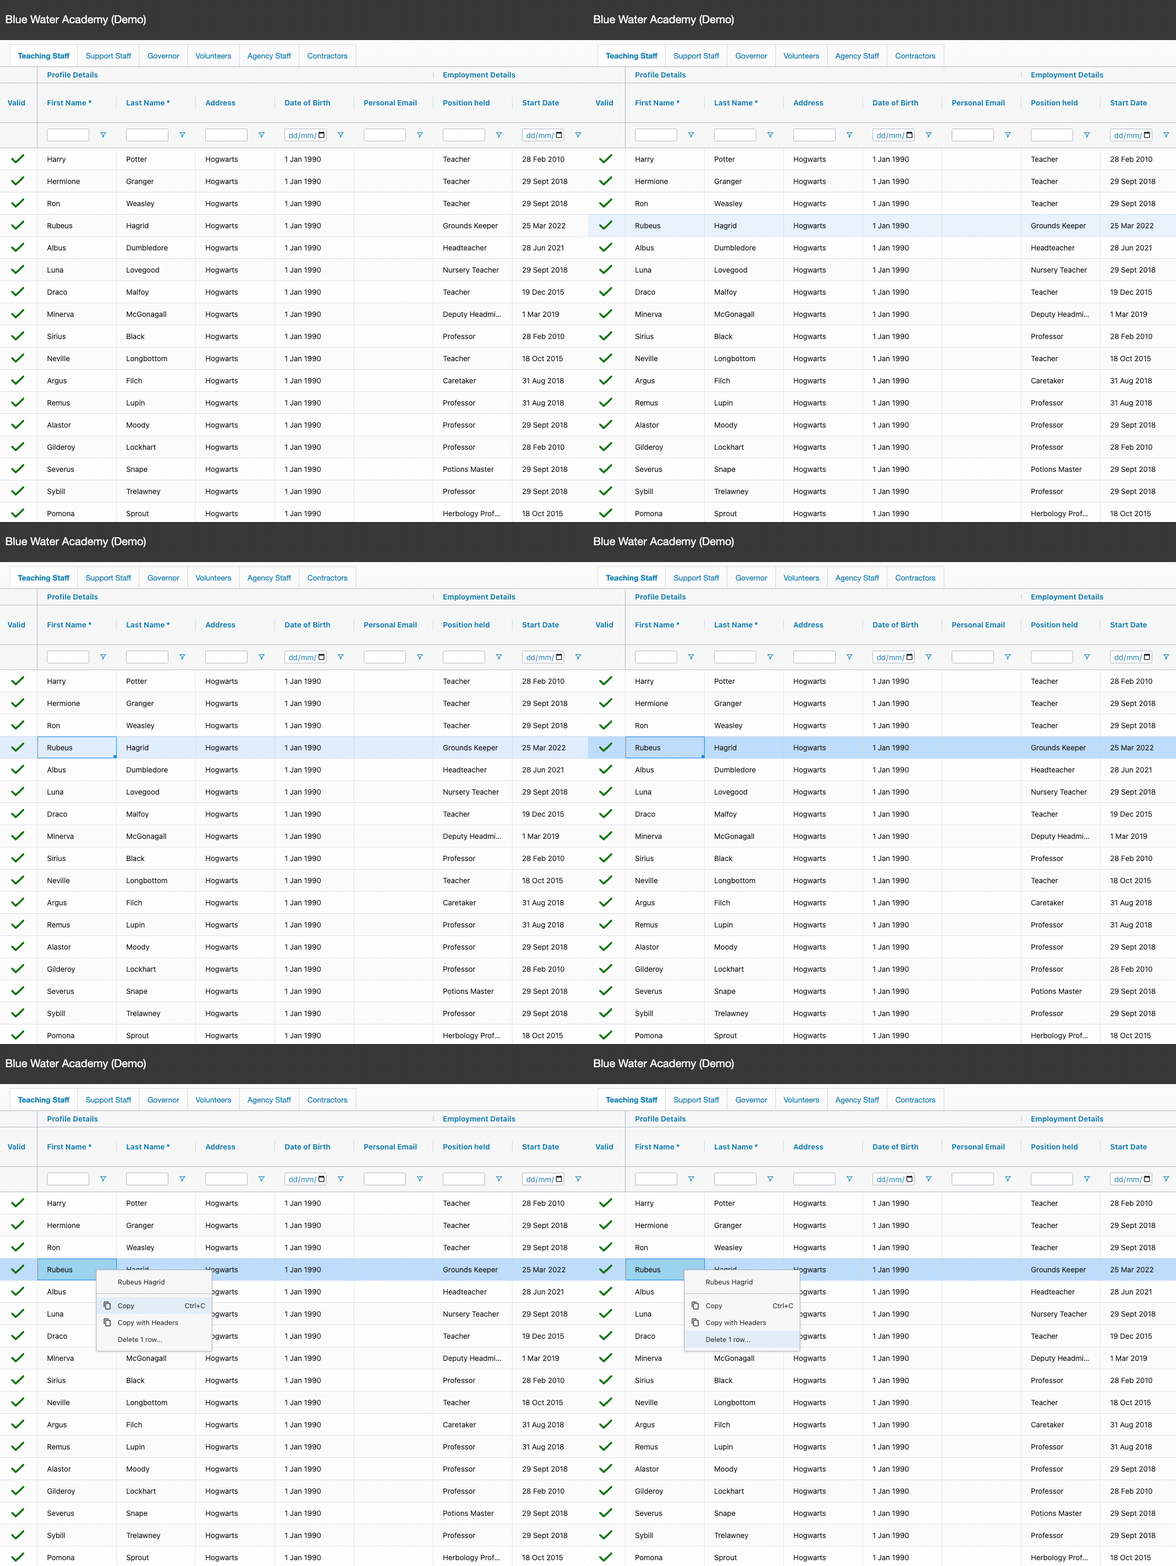
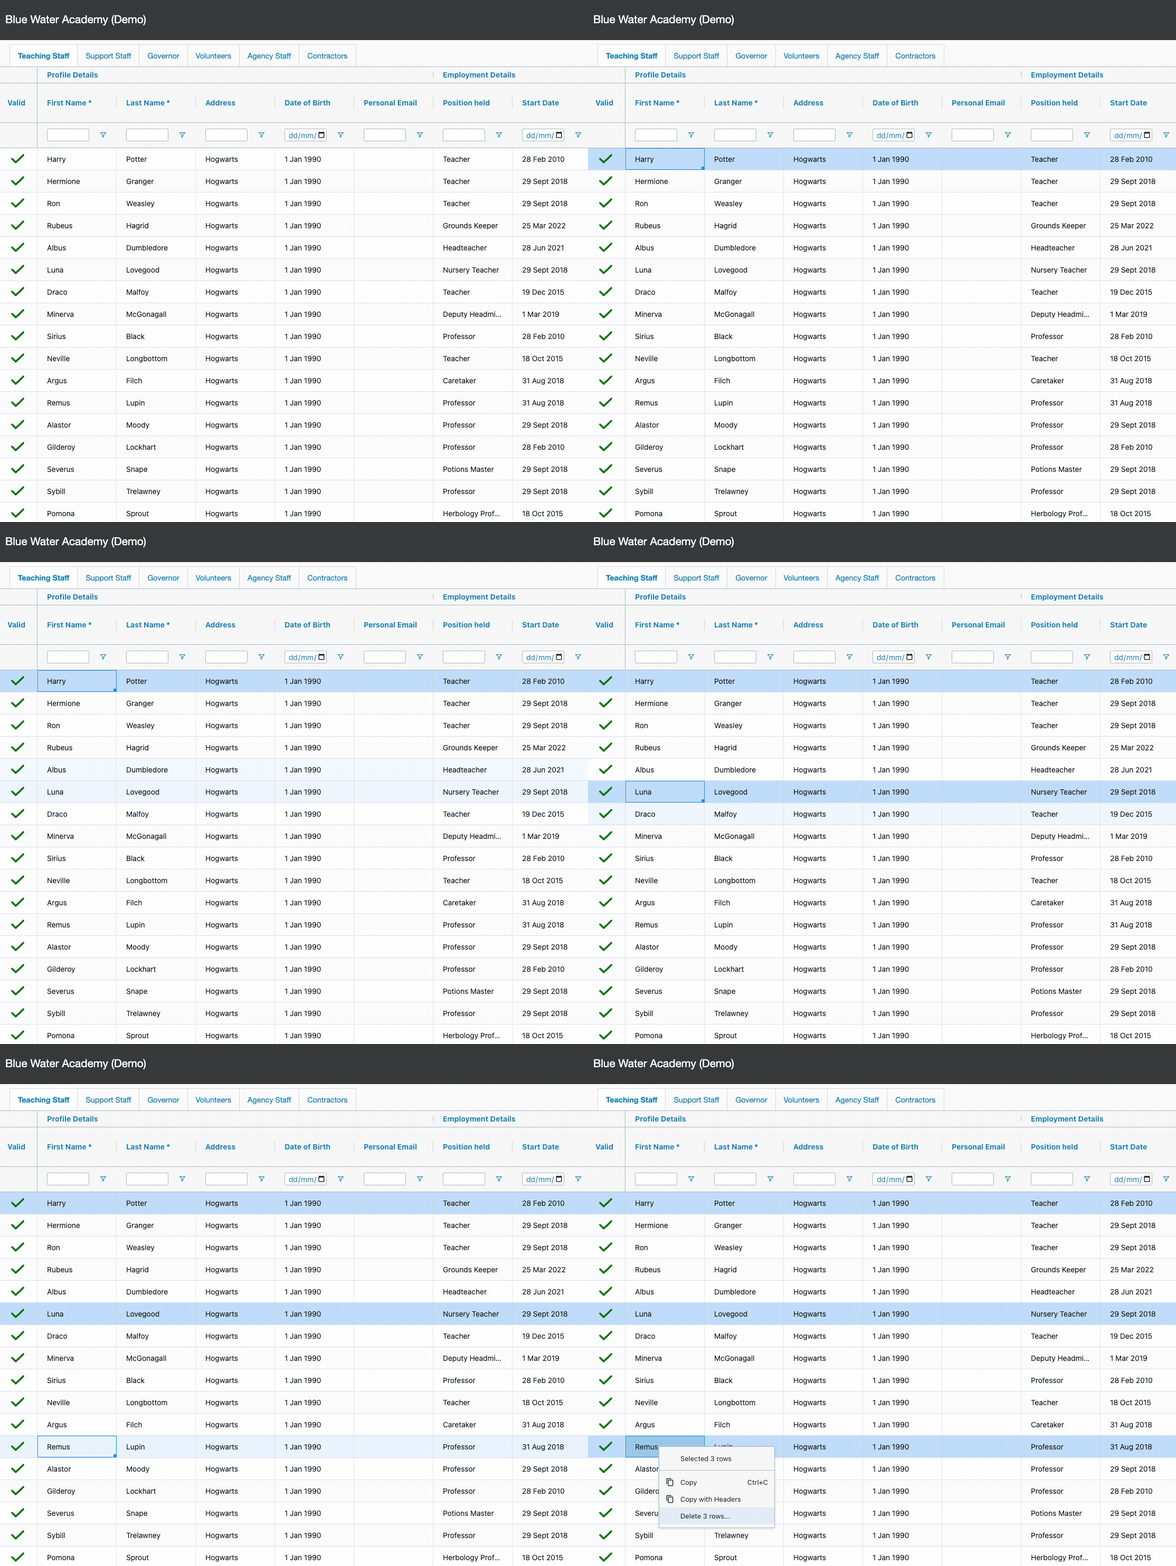
- To delete multiple sequential rows: Left-click on the top row you wish to delete, then while holding the Shift key, left-click the last row. This will select both the clicked rows and anything in between. You can then right-click and select Delete as above.
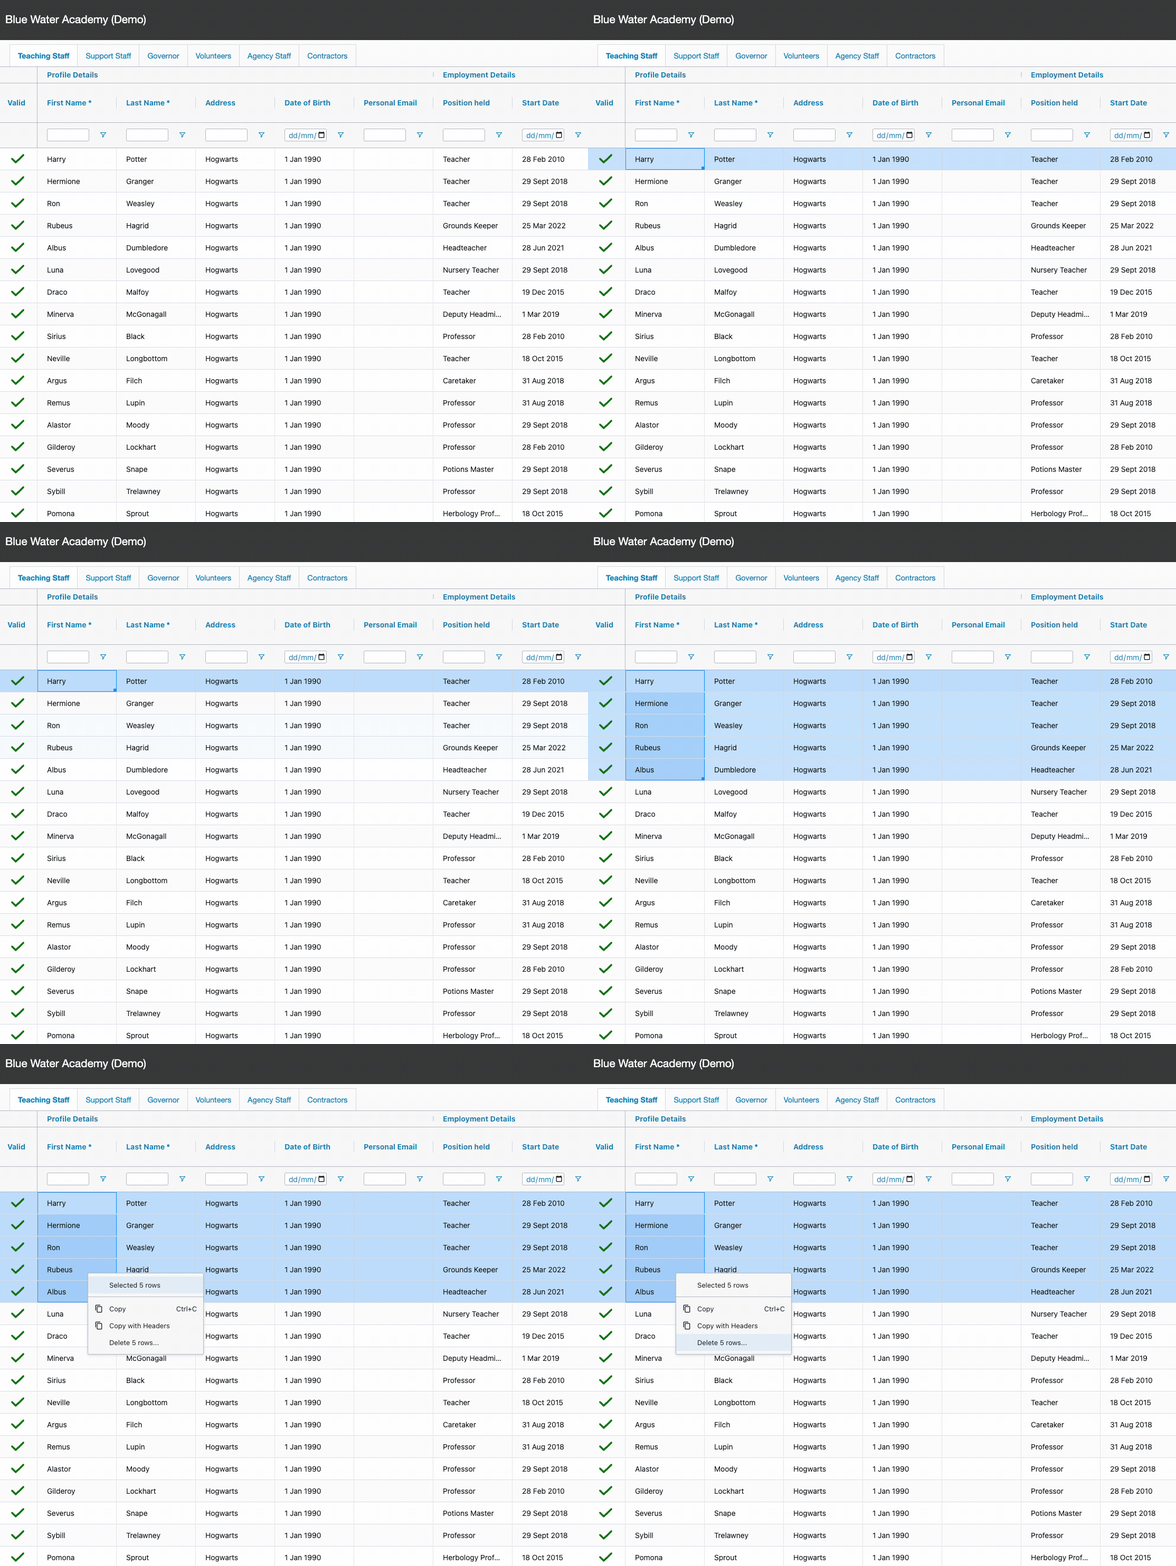
- To delete staggered rows (which may not necessarily be grouped together): While holding the Ctrl key (or Command, depending on your keyboard), left-click the required rows. If you select one by accident, just keep holding the Ctrl key (or Command) and click it again. You can then right-click any of the selected rows, and select Delete as above.
Undo or Deleting Profiles
We don't yet have an undo facility, but you can delete the profiles that you created. To do this follow the instructions on Deleting Multiple Profiles.
